Thursday 9 October 2014

New Product: MAC Studio Sculpt Defining Powder


MAC Studio Sculpt Defining Powder is a new item from the "Studio Sculpt" collection and it comes in 8 different shades: Light, Light Plus, Medium, Medium Plus, Medium Dark, Medium Deep, Dark, Dark Deep. It retails for $32.00. The product is not yet available in Italy because I checked the italian website and I didn't find it at the Studio Sculpt section.

As stated on the MAC website:

"Studio Sculpt Defining Powder offers sheer, barely-there coverage, immediately correcting uneven tones, leaving skin smooth and sculpted without looking powdery or cakey. Colour glides on with a unique, velvety touch, in eight new shades from Light to Dark Deep. Gel formula infuses the powder with exteme creaminess, providing enough structure to maintain a defined, refined finish."

"Barely there gel formula provides sheer coverage in weightless application. Extremely silky and cream-like, it encompasses the best properties of a liquid and powder for a sculpted look without a heavy makeup feel."


Unfortunately only 3 shades were available (Light Plus, Medium Dark and Medium Deep) so I ended up on buying the lightest among the three just to give it a try. I thought since it's a bit lighter than my skintone I can use it to set my undereye concealer and brighten that area.


Packaging:


Nothing out of the ordinary MAC powders. It comes in a thin compact without a sponge or a powder puff included, but it does have  the standard mirror. It contains 10g/.35 oz.


It has that nice design imprinted on it just like the Studio Sculpt Shade and Line compacts.


Swatch and Texture:

(Light Plus)

It is extremely smooth, silky and velvety. The texture is light and soft. If you stick your finger in it, you can definitely feel that it is between a foundation and powder but if you use a brush it is apparently a powder.


If you look closely you can see just a subtle and slightest iridescence in it. That subtle shimmer supposes to catch the light and make your skin appear soft focused, smooth, and not dull-looking. It also minimizes the appearance of pores making them less noticeable.
It doesn't have a scent on it.


In my opinion, it is a great product perfect for setting your foundation. If you tend to be oily, it will help control the oil a bit.

I will definitely re-purchase this! :D


♥ itsmeKANON


Sunday 28 September 2014

MAC "Mehr" lipstick

Yesterday I went to M.A.C. at Porta di Roma because I really wanted to buy "Velvet Teddy" lipstick but it was out of stock as well as "Brave", "Faux", and "Twig" ... Then I found this lipstick that is quite similar shade with those that I wanted but it is more on a brown-pinkish side.


I suddenly fell in love with the color because it was really flattering on me since the shade complements my skintone. The shade that I'm talking about is "Mehr".


I'm into matte looks lately (matte eyeshadows, matte face, matte lipstick) and I'm really happy that I bought this (though I'll surely try to go to other M.A.C. stores and get the other shades that I've mentioned before).


I haven't done some swatches yet but definitely I'm going to update this blogpost.
When I swatched it on the store it reminded me somehow of the lip color which Kylie Jenner is sporting on her pictures on IG thought this is more on the brown-pink kinda mauve side.

What do you think? :)


♥ itsmeKANON

My sister did my hair

My sister is a self taught hairstylist. I'm planning on teaming up with her for my makeup gigs :)
here are some pictures of her latest masterpiece.


She's into DIYs lately: she made this "bow hair clip"
amazing isn't it?


♥ itsmeKANON

Wednesday 24 September 2014

Benefit: The Real Steal

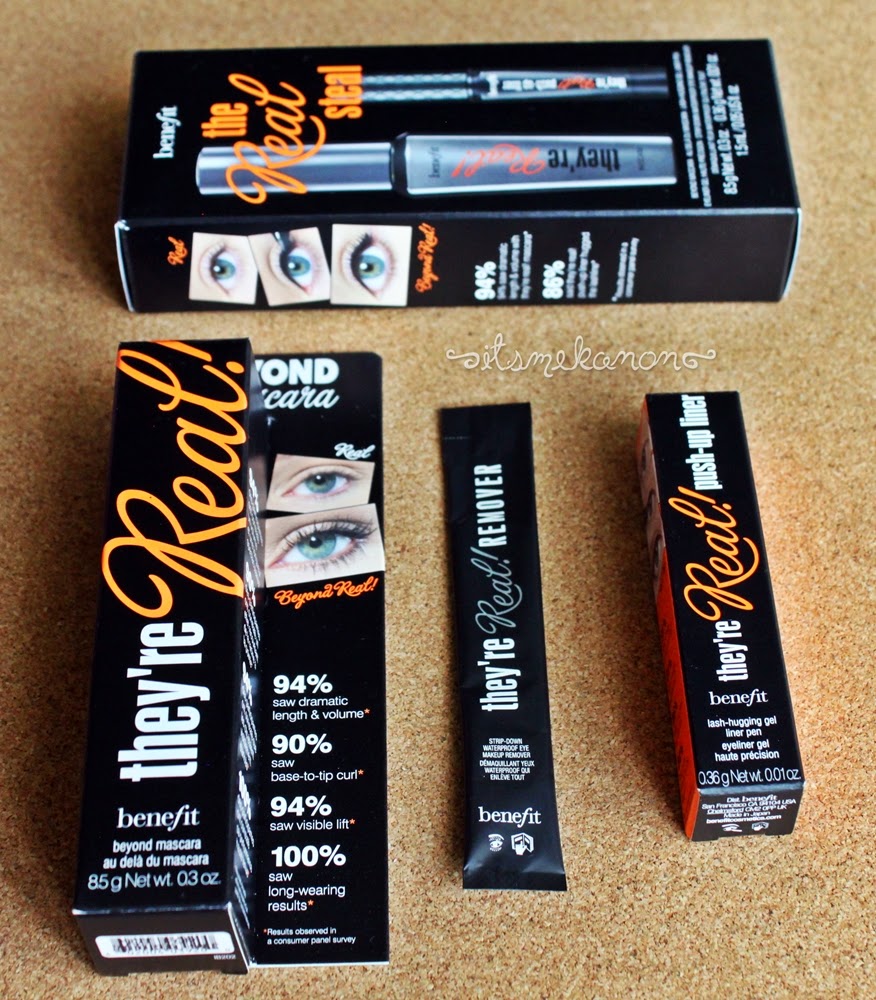
I went to Sephora three days ago because I wanted to buy the lash amplifier but I ended up on buying also this set from Benefit. I'm so happy I finally own it because I've heard good things about it and I've been raving for it for the longest time.

I'm talking about Benefit's "They're Real" mascara. At first I was really hesitant on buying it but when the saleslady tried it on me, I immediately changed my mind.

Benefit "The Real Steal" set
price: 26.90 euro at Sephora


The set contains: "They're Real" mascara (full size), "They're Real" remover, (sample size) "They're Real" push-.up liner (travel size) 

"They're Real" mascara

The greatest mascara I've ever tried so far because it really does a great job on lengthening, volumizing and curling my eyelashes. I don't even need to use an eyelash curler. It's longwear and waterproof.


The tip of the wand is made for curling and separating the lashes while the rest is for lenght, volume and lift.

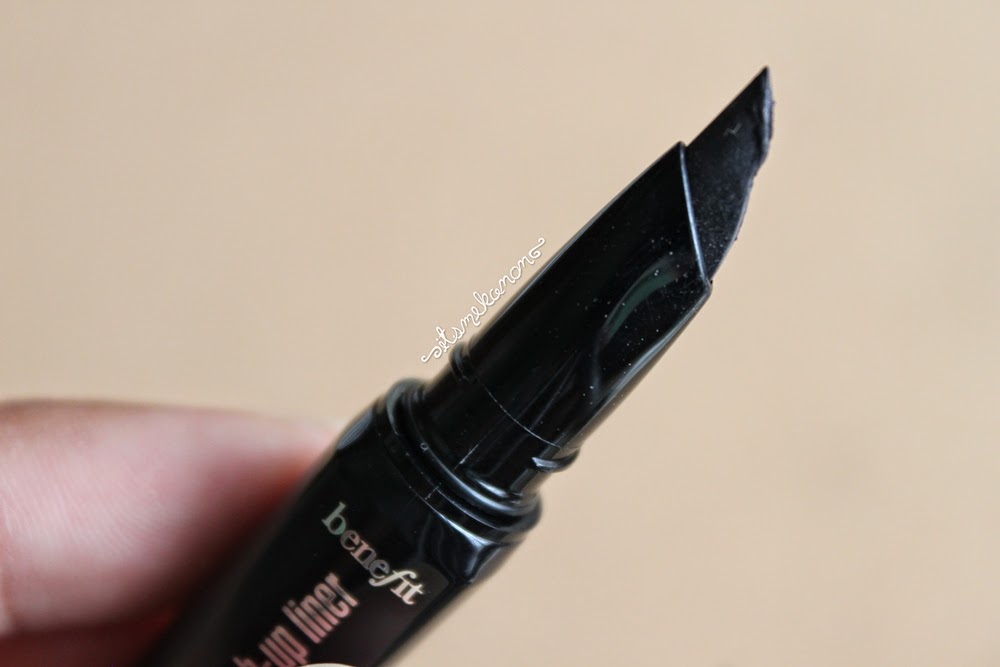
"They're Real" push-up liner


Along with the mascara, I've also got the "They're Real" push-up liner. It's so cute because it's a travel size one and I think it's great to start with a small one since I'm not familiar with this type of eyeliner: infact it's a gel eyeliner in a pen form! You have to twist the base once to "push up" the gel liner to the tip.


The tip of the liner makes the application much easier and smooth as it "hugs" the lashes in order to have a precise application. It is also gentle to use on the upper lashes to tightline. It's smudgeproof, waterproof and longwearing.


♥ itsmeKANON


Le nuove "Baby Lips"..... ELECTRO!

Baby Lips Electro (a sinistra: Pink Shock, Oh! Orange! & Berry Bomb)
prezzo: 3.99 euro

Ciao! Da quanto tempo! Non ho più aggiornato questo blog da marzo ma adesso sono tornata e in più vi scrivo in ITALIANO. :)

Oggi vi voglio parlare delle nuove "baby lips" della Maybelline. Si chiamano "Baby Lips Electro". Credo siano uscite da poco qui in Italia e io le ho da quasi 2 settimane.

Baby Lips Electro (a sinistra: Pink Shock, Oh! Orange! & Berry Bomb)

Ho comprato solo 3 (fucsia, arancione, viola) perché sono quelle scriventi e un po' colorano le labbra.
Sono molto idratenti e profumate (a me viene sempre voglia di mangiarle! hahahaha). Il packaging è molto simile a quelle normali tranne per il tubetto che contiene il prodotto. E' di colore nero per tutte le colorazioni.

ecco gli swatches :) il mio preferito è Pink Shock

Sono ideali per l'autunno-inverno per mantenere le labbra idratate.


♥ itsmeKANON


Wednesday 19 March 2014

Tiramisu Cake


I decided to use sponge cake instead of savoiardi biscuits (lady fingers). It really tastes good! :)

Ingredients

Sponge Cake:
- 3 eggs
- 100g sugar
- 90g flour
- 15g butter
- 1 tbsp milk

Mascarpone cream:
- 250g mascarpone
- 2 eggs (separate egg yolks from egg whites)
- 1 1/2 tbsp sugar

Coffee syrup:
- 1/2 cup of espresso coffee

Garnishment:
- chocolate flakes

Procedure

SPONGE CAKE:
1) Boil some water in a pan. The ideal temperature is between 160-170° C.


2) Put the eggs in a bowl and beat them in low speed.


3) Put the sugar in the egg mixture and beat for 30 sec.


4) Deep the bowl in the hot water and beat for 1-2 mins until the sugar is totally dissolved. Take it off the hot water.


5) Add milk to the butter and melt.


6) Beat the egg mixture in high speed for 3-4 mins until it forms a whipping pattern on the surface (soft peak stage).


7) Sift the flour into the mixture and gently mix about 30 times. Pour the butter mixture and fold the batter for 50 times until it becomes glossy and smooth.


8) Pour the batter in a circle baking pan. Tap it to release air bubbles and bake for 23 mins. Let it cool.


MASCARPONE CREAM
9) Beat the egg whites until it becomes firm. Set aside.


10) In another bowl, beat the egg yolks and sugar. Add mascarpone and mix well.


11) Add the beaten egg whites in the mascarpone mixture and gently mix until all the ingredients are well combined. Put inside the fridge for 10mins


CAKE ASSEMBLING
12) Cut the cake into half with the cutting area facing up. Soak the cut part with the coffee syrup.


13) Put a generous amount of cream on the first layer and spread evenly. Add some chocolate flakes and cover with the other layer.


14) Repeat the same procedure as step 13. Keep in the frigde for 15mins and serve it. ^_^


If you make this, take some photos and upload it on INSTAGRAM with the hashtag #bakingwithKANON
I'd be glad to see some re-creations of my recipes.


Monday 17 March 2014

Brownie Bites


Ingredients


- 55g of butter
- 115g of dark chocolate in pieces
- 175g of brown sugar
- 2 eggs
- 85g of flour
- 55g crushed toasted peanuts
- white royal icing


Procedure


1) Preheat the oven to 180 °. Melt the chocolate and butter in a double boiler. Mix well and leave to cool.


2) Pour the sugar and eggs in a large bowl and whisk until they form a light and fluffy cream. Combine in the chocolate mixture and sift in the flour and baking powder and mix thoroughly. Finally, add the crushed peanuts.


3) Grease a rectangular baking tray and pour the mixture in it. Put inside the preheated oven and bake for 20-25 mins until it becomes firm. Let it cool. Cut into small squares and top it with royal icing.


Enjoy! ^_^


Wednesday 12 March 2014

Egg Custard Tarts


I made these yesterday morning because I was craving for it!


Ingredients


For the butter dough:
- 1 cup of flour
- 125g of cold butter
- 50g of brown sugar

For the water dough:
- 1 cup of flour
- 2 eggyolks
- 1/4 cup cold water

For the egg filling:
- 3 large eggs
- 1 cup of milk
- 1 teaspoon of vanilla extract

For the simple syrup:
-1/3 cup of sugar
-1/2 cup of water


Procedure


BUTTER DOUGH
1) Take the cold butter and cut into cubes. Combine the butter cubes, sugar and flour until you can form a ball.


2) Transfer the butter dough onto a large sheet of plastic wrap and wrap it until you form a square shape. Refrigerate the dough for 15mins.

WATER DOUGH
3) Combine eggyolks to the flour. Add half a teaspoon water at a time until you can form a ball of dough.


FOLDING THE DOUGH (technique 3x4x4)
4) To work the dough nicely make sure to have a floured surface. Roll out the water dough about a 1/4" thick in a diamond shape.


5) Take the butter dough out of the fridge and place it on the center of the water dough and wrap it up like a little present. :D


6) Roll it out into a rectangle shape. Fold into thirds. (There should be 3 layers)


7) Roll it out again into a long rectangle. Take the both ends of the rectangle and meet it up into the center. Take a quarter and fold it like a book (there should be 4 layers)


8) Repeat the same procedure of the step 7. Pop it into the fridge

SIMPLE SYRUP
9) Combine water and sugar and microwave for one minute. Set aside to cool.


EGG FILLING
10) Into a bowl combine eggs, milk and vanilla extract. Whisk together and slowly add the cooled simple syrup. To make sure that the custard is smooth when it cooks, sift it a couple of times.


11) Preheat oven to 220°C. Roll out the dough and cut out the dough with a cookie cutter about the same size as your mold. Lay it down the molds. Press into the bottom and inner edges. With your thumbs slowly work the dough up unto the sides of the molds until it meets the corners. Take a fork and prick the bottom of the tart to prevent it from puffing while cooking.

12) Put the tarts onto a baking tray. Fill them up with the egg filling. Cook for 15-20mins until the crust turns into a light golden brown color and just until you can touch the custard filling without sticking onto your finger. Take them of the molds and trasfer them onto a cooling wrack.


YUMMY!!!!!!!!!!! *_*